
Okay, so in the last lesson, we learned to use a pushbutton to have our LEDs start blinking. The code used the delay(int millisecondsToWait) function to create the blinking effect. However, I noticed that when the button was released, the way the code was written, the delay for HIGH and then LOW caused the LEDs to continue to blink until the delays completed. Instead, I wanted the LEDs to stop immediately. I said in Lesson 5 that this lesson would cover the ability to stop that behavior by getting rid of the delays and that we would also cover having the pushbutton act as a toggle switch instead. However, after writing the code to replace the delays I decided that each piece of functionality should be its own lesson.
Now, we still start the blinking by pressing the button and holding it, however, the blinking stops immediately once we release the button. In the future, when we have implemented the toggle code and have the servomotor running at the same time, the desire will be for the code to work differently. Ultimately, I want to press the button and have the LEDs blink and the servomotor lower the simulated railroad crossing gate all the way, no matter if we push the button again or not. Only after the gate is lowered all the way will we allow the process to begin to raise the gate. Only after the gate is all the way up will we turn off the blinking LEDs.
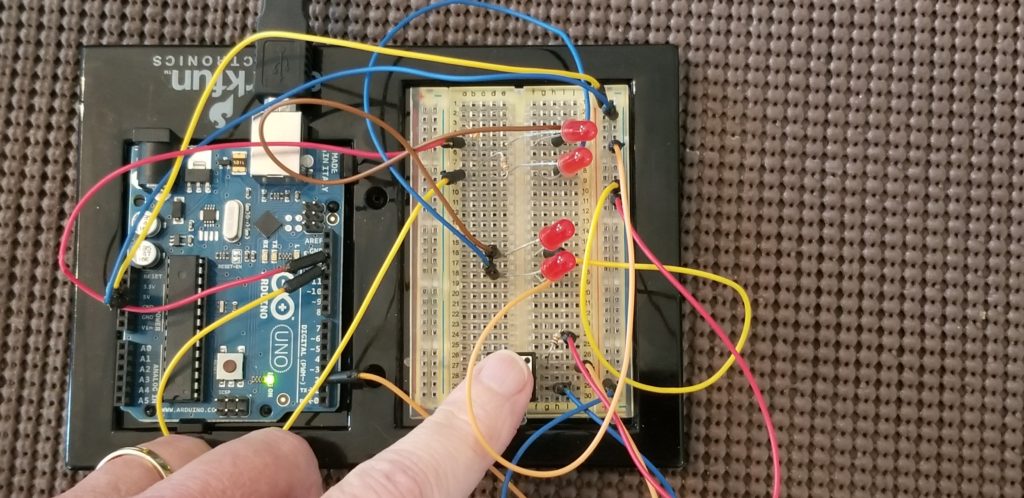
For this lesson, we’re using the same build on the Arduino board that we used in the last lesson. The changes all take place in the code and I will be using the Arduino example, “Blink Without Delay” (link in Resources below) for inspiration.
/*
 arduino_lesson_6
 MakerDaddy.com

 */
 const int leftLeds = 13;
 const int rightLeds = 12;
 const int buttonPin = 2;
 int buttonState = LOW;
 int leftLEDState = LOW;
 int rightLEDState = LOW;
 bool leftOn = true;
 bool rightOn = false;
 // Generally, you should use "unsigned long" for variables that hold time
 // The value will quickly become too large for an int to store
 // will store last time left LEDs were updated
 unsigned long leftPreviousMillis = 0;
 // will store last time right LEDs were updated
 unsigned long rightPreviousMillis = 0;
 // interval at which to blink (milliseconds)
 const long interval = 500;
 void setup() {
   // initialize the LED pins as output
   pinMode(leftLeds, OUTPUT);
   pinMode(rightLeds, OUTPUT);
   // initialize the pushbutton pin as an input:
   pinMode(buttonPin, INPUT);
 }
 void loop() {
   buttonState = digitalRead(buttonPin);
   unsigned long currentMillis = millis();
 if(buttonState == HIGH){
     // check to see if it's time to blink the LED; that is, if the difference
     // between the current time and last time you blinked the LED is bigger than
     // the interval at which you want to blink the LED.
     if(currentMillis - leftPreviousMillis >= interval && leftOn){
       leftPreviousMillis = currentMillis;
       // if the LED is off turn it on and vice-versa:
       if (leftLEDState == LOW) {
         leftLEDState = HIGH;
       } else {
         leftLEDState = LOW;
         leftOn = false;
         rightOn = true;
       }
       writeLED(leftLeds, leftLEDState);
     }
 if(currentMillis - rightPreviousMillis >= interval && rightOn){   rightPreviousMillis = currentMillis;   // if the LED is off turn it on and vice-versa   if (rightLEDState == LOW) {     rightLEDState = HIGH;   } else {     rightLEDState = LOW;     leftOn = true;     rightOn = false;         }      writeLED(rightLeds, rightLEDState); }
 }else{
     writeLED(leftLeds, LOW);
     writeLED(rightLeds, LOW);
   }
 }
 void writeLED(int pin, int state){
    digitalWrite(pin, state);
 }
We are now checking the current time in milliseconds every time we pass through the loop() function. Then we compare that with the interval for which we want to turn the LEDs on. In this case, we initialize the interval variable with 500, which is the period of time we want the left and right LEDs to be on during the blink.
leftLEDState and rightLEDState are variables that store the value of the pin signal (voltage) that will be written to the left LEDs pin and the right LEDs pin. The values will either be LOW or HIGH depending on whether we are turning the LED on or off.
leftPreviousMillis and rightPreviousMillis store the exact time that we “turned on” that set of LEDs. We will then compare that against the current time and interval to determine if it is time to turn them on again or turn them off.
leftOn and rightOn are bool variables, meaning that they can have values of either true or false. We will use these variables to switch between the left and right LEDs.
In setup() we set the pinMode for the LED pins to OUTPUT and the button pin to INPUT.
Okay, now for the exciting stuff! Remember that our loop() function runs continuously, over and over. Each time we enter/re-enter the loop we will check the state of the button in buttonState = digitalRead(buttonPin). This tells us if the button is being pressed or not.
Then we assign the current time in milliseconds to the variable currentMillis. According to the Arduino documentation, the millis() function returns “Returns the number of milliseconds passed since the Arduino board began running the current program. ” So imagine that once you load the sketch to your board, a stopwatch is started from 0, running very quickly. Every time we enter the loop() function we record the very millisecond after we started is now set into our variable currentMillis.
Next, we check the value of buttonState. If it’s HIGH, the button is pressed, we will run code to determine which LEDs should be on and which should be off. If it’s LOW, meaning that we released the button, we turn both LEDs off by sending a LOW signal to their respective digital pins.
If buttonState is HIGH we make a comparison in an “if” statement. “if(currentMillis – leftPreviousMillis >= interval && leftOn){” This code reads from left to right. First, we subtract the value in leftPreviousMillis from currentMillis. In the first time we encounter this code, leftPreviousMillis is equal to 0 because that’s how we initialized it when we declared the variable at the top of the code. At this point, currentMillis is greater than 0 (remember that our stopwatch started when we loaded the sketch, not when we entered loop() so it’s definitely greater than 0). We take the “subtracted” value and compare it to the value in the interval variable, in this case, 500. If the subtracted value is more or equal to 500 then we have a “true” condition. Then we look at the other condition after the &&, which is an “and” operator. If the first statement is true, then we will check the second (or more) statement (leftOn for this section). If both statements are true then the “if” is true and we will run the code in the “if” block of code. If the first condition is false, for example, the subtracted value is equal to 320 and interval is equal to 500, therefore 320 is NOT equal to or greater than 500, we don’t even bother to look at the second condition because they obviously cannot both be true if the first one is false.
We initialized leftOn to be true when we declared the variable. So if the subtracted value is actually 500 or more, the first condition will be true and the second condition will be true, so we will run the code in the “if”. Now we set the leftPreviousMillis value to be equal to currentMillis (current time on the stopwatch). We have to update it every time we hit this code so we can eventually get a false when our subtracted value is not greater than or equal to 500.
Next, we check to see if the leftLEDState is equal to LOW. If it is, set it to HIGH. Otherwise, set it to LOW. And since we are turning the left LEDs off, we need to set leftOn to false and rightOn to true. These are “flags” that we use in our “if” statements to determine which set of LEDs are on vs. off at any given moment.
Before we leave the “if” code block, we write to the left LEDs pin using our writeLED function. This function takes the pin and signal (HIGH or LOW) and will in turn call digitalWrite to send the signal to the pin.
Next, we have another “if” block of code that does the same thing for the right LEDs.
This has been a bit complicated, so I recommend also watching the video below where I will go into more detail on how the logic works.
Resources
Blink Without Delay Arduino Tutorial
Arduino millis() function reference
Previous Lesson: Arduino Lesson 5 – Basic Pushbutton
Next Lesson: Arduino Lesson 7 – Debounce the Button and Operate as Toggle Switch